Volkswagen Radio Problems - VW RNS 510 Fault
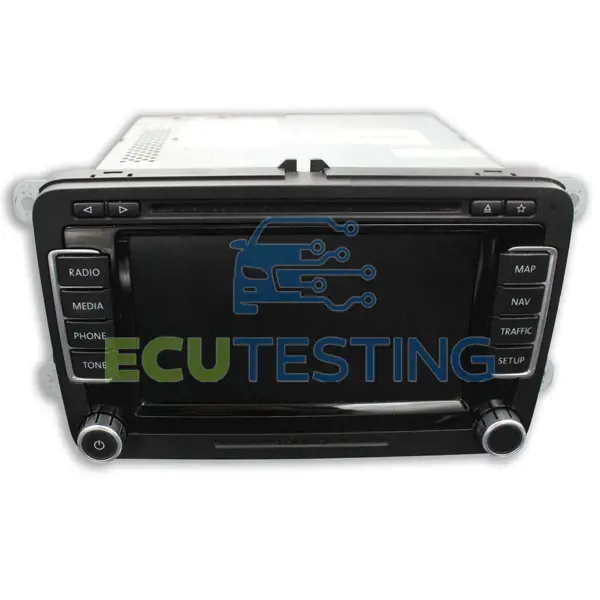
RNS 510 infotainment unit failure is common for various 2008-16 VW vehicles, particularly the Passat B6. If you are experiencing issues like radio problems or the touch screen not working in your Volkswagen, it’s likely your unit is defective.
When failure strikes it’s common for drivers to lose audio or visuals before the infotainment repeatedly fails to reboot itself – often only getting as far as a ‘Welcome to Volkswagen’ screen.
As the VW RNS 510 is a sophisticated combination of navigation and entertainment technology, its complex nature can cause some unique issues. Affected owners may experience a darkened screen, discs getting stuck, language changes (often defaulting to German) or complete failure to switch the screen off.
As this malfunction is caused by extensive internal failures, you’ll be unable to shift your Volkswagen radio problems until your RNS 510 has been repaired or replaced.
VW RNS 510: Repair or Replace?
When attempting to remedy your VW RNS 510 radio problems you may have considered a replacement rather than a unit repair. However, brand new control modules remain vulnerable to the original malfunction. Therefore, we’d always recommend sourcing a repaired RNS 510 for a longer-lasting solution.
Solution
Due to the extent of internal failures, we no longer offer our test-and-rebuild service for the VW RNS 510 infotainment unit. Alternatively, we’d recommend purchasing a repaired RNS 510 to resolve your Volkswagen radio problems. You can find repaired RNS 510 units from online specialists, such as: https://www.hazzydayz.com/vw-rns-510-refurbished-with-sat-nav-dvd-player-supply--fit-4304-p.asp.
Affected Vehicles:
- Volkswagen Passat 2009-2015
- Volkswagen Golf 2008-2014
- Volkswagen EOS 2006-2014
- Volkswagen Sharan 2010-2015
- Volkswagen Tiguan 2008-2011
- Volkswagen Caddy 2009-2015
- Skoda Superb 2010-2015
- Skoda Yeti 2013-2016
- Volkswagen Scirocco 2009-2014
- Volkswagen Amarok 2010-2016
- Volkswagen CC 2012-2015
Common Failure symptoms:
- Intermittent power, switching off and on randomly.
- Display stuck in rebooting loop
- Stuck on welcome to Volkswagen screen
- Not switching off
- Touchscreen unresponsive
- No display at all
- Discs getting stuck
- Blank screen
Common Failing Part Numbers:
- A2C53410028 / 1T0035680C
- A2C80541500 / 1T0035680C
- A2C53380364 / 3C0035680C
- A2C33064501 / 1T0035680F
- A2C94591500 / 3T0035686L
- A2C53302073 / 1T0035680A
- A2C53350029 / 1T0035680B
- A2C95940900 / 2H0035680A
- A2C53373802 / 1T0035680B
- A2C93124600 / 1T0035686E
Location on the vehicle:
The RNS 510 head unit is located in the centre console of your vehicle, between the driver and passenger seat.
Removal/refitting guide:
Before removal, remove any discs left in the device.
Switch off the ignition and pull out the key.
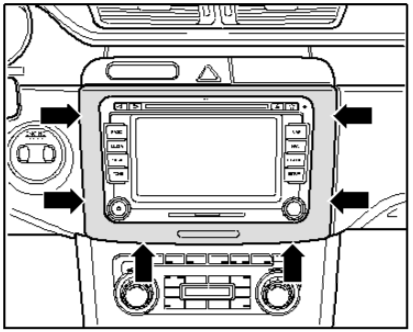
Carefully remove the cover surrounding the unit.
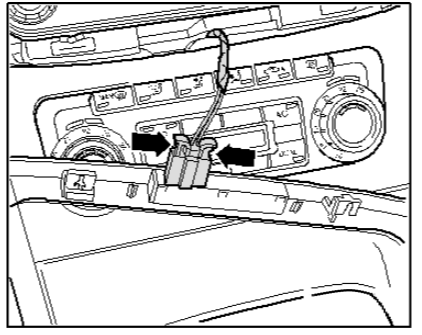
Unlock and disconnect the connector on the cover.
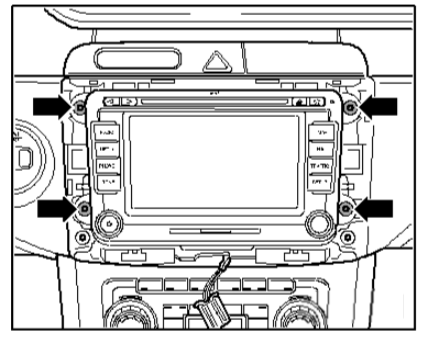
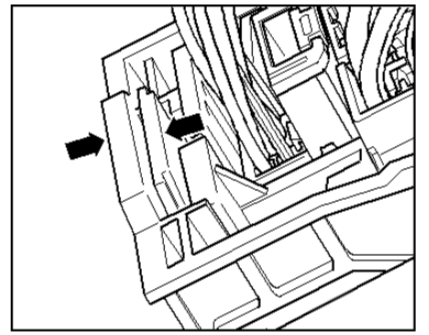
Remove the four screws securing the unit.
Pull the unit out of the console to reveal the connectors.
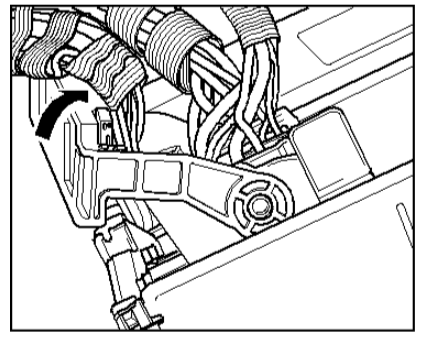
Press the locking mechanisms together in the direction shown.
Move the lock bar up and disconnect the connectors.
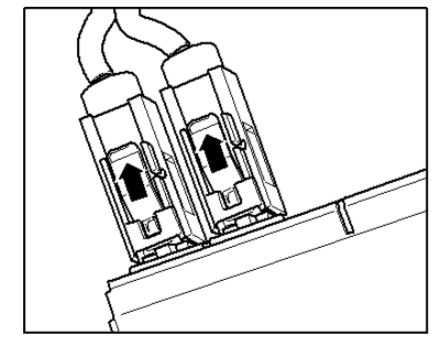
Press the aerial connectors and pull off from the plug.
To install the unit follow the removal guide in reverse.